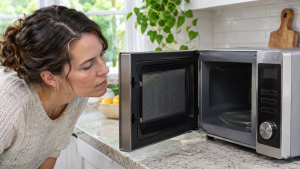
A Door That Needs a Push Is Giving You Useful Information
The microwave door is more than a cover for splatters. It must seat correctly so the appliance’s safety system can confirm a closed door. A container that is a little too wide, a cooking rack out of position, or hardened food on the contact area can stop normal closure. Whirlpool’s door guidance begins with those visible conditions. They are reasonable homeowner checks only while the appliance is off and cool.
A changed door shape is different. If one corner hangs away from the frame or the door must be lifted to catch, the issue is not solved by a harder shove. The FDA says not to use a microwave with a door that does not close firmly or with damaged hinges, latches, or seals. That is the dividing line in this guide. You can clear a removable obstruction; you cannot verify a damaged door’s safety by watching it run.
A microwave that closes normally but will not heat belongs in the running-but-not-heating guide. A panel that ignores a button has a separate control-lock and button guide. Those symptoms can coexist with a latch problem, but the physical door comes first. If the door is damaged, do not operate the unit to gather more clues. The microwave repair service can assess the door and interlock system by model.
For model-specific service after these checks, see Microwave repair, Microwave not heating.
Reading the Clues
Look at the door in good light while it is open and the microwave is off. A spoon left against the frame, food on the sealing surface, or a removable rack sitting crooked may be obvious. A scrape on one side, a dropped door, a crack near the hook, or a gap that changes as the handle is raised is not ordinary dirt. Note whether the problem started after a move, a door slam, a heavy container strike, or cleaning. Do not compare the appliance to a video of another model; door designs and interlock sequences differ. A door that clicks but springs back can still be misaligned. If you must hold it in place, it has failed the homeowner test. Photograph the gap from a safe distance and record the model number for service. Do not run a heating test while the closure question remains open.
Step-by-Step Troubleshooting
1. Turn the microwave off
Cancel the cycle and wait for the cavity and dish to cool. If it operates with the door open, discontinue use and unplug it at an accessible outlet if safe.
2. Remove the dish and approved rack
An oversized plate or a cooking rack out of position can meet the door before the latch does. Remove both for one closure check; never force cookware past the frame.
3. Look for leftover packing
A newly installed unit may still have packing material near the latch path. Remove only loose, visible packaging described by the manual.
4. Clean accessible contact surfaces
Use a soft cloth, water, and mild detergent on the cavity edge and door contact area. Dry it. Do not scrape, pry, or remove the seal.
5. Inspect hinges and hooks visually
Look for cracks, bending, sagging, looseness, or a door that sits unevenly. Do not attempt to align the hinge or repair a latch hook yourself.
6. Try one gentle close
Close with normal hand pressure. A firm, even fit is the goal; repeated slamming is not a diagnostic method.
7. Separate closure from a control issue
If the door closes firmly but Start still fails, check Control Lock and the exact cycle instructions. Do not bypass an interlock or hold the door inward to make a cycle start.
8. Check the surrounding installation
A countertop unit should sit on a stable, level surface. An over-the-range microwave that shifted or sags needs professional mounting assessment; do not loosen its brackets.
9. Stop for any damaged door
A persistent gap, cracked latch, bent door, or damaged seal is enough to stop use, even if the display and light work.
10. Book model-specific service
Give the technician the model, photos, whether the door catches empty, and whether the appliance ever ran with the door open. Leave the unit unplugged if that last condition occurred.
Brand-Specific Considerations
Whirlpool and KitchenAid: Whirlpool lists packaging, oversized cookware, an incorrectly placed cooking rack, and soil on contact surfaces as first checks. Follow the exact model’s door instructions.
GE and Café: Check whether the door sits squarely and whether an interlock error follows a normal close. Do not treat a control reset as proof a crooked door is safe.
Samsung and LG: Control Lock and sensor-cooking messages vary by model. Confirm the physical door first; a latch that needs hand pressure is not a settings issue.
Sharp and built-in models: Trim kits and built-in mounting can affect access. Leave cabinet, trim, and hinge removal to qualified service.
Repair vs. Replace Guidance
A removable dish or soil obstruction needs no part. A latch or hinge may be repairable when the door shell and frame remain sound and compatible parts exist. A bent door, cracked frame, unavailable door assembly, or repair estimate approaching a comparable replacement can change that choice. Countertop models may be cheaper to replace than to repair, but over-the-range and built-in units have installation costs that belong in the comparison. The decision follows a safety assessment, not a trial cooking cycle.
Cost Expectations
A removed dish or cleaned contact surface needs no part. Latch, hinge, door assembly, and interlock repairs differ considerably by model and installation. Ask for an estimate that identifies the damaged component and includes proper safety verification. A cheap hook is not a cheap repair if the door shell or frame is bent. Do not compare parts prices alone with the cost of a new countertop or mounted unit.
Why Choose Universal Appliance Repair
Universal Appliance Repair can evaluate a door that still does not close firmly after accessible obstructions are removed. A technician can identify whether the problem is alignment, latch, hinge, or interlock without asking you to run a potentially unsafe appliance. Use the microwave repair service for model-specific diagnosis.
Appliance Lifespan Table
Refrigerator: 10-15 years. Maintenance priority: clean coils, protect door seals, and keep temperatures steady.
Freezer: 10-20 years. Maintenance priority: keep vents clear, check gasket contact, and defrost models that require manual defrosting.
Dishwasher: 8-12 years. Maintenance priority: clean the filter, inspect spray arms, and avoid blocked drain paths.
Washing machine: 8-12 years. Maintenance priority: avoid overloading, use the right detergent amount, and inspect hoses.
Dryer: 10-13 years. Maintenance priority: clean the lint filter, vent path, and exterior termination.
Range or oven: 10-15 years. Maintenance priority: keep burners, igniters, caps, racks, and controls clean.
Maintenance Checklist
- Keep the door contact area free of food buildup.
- Use cookware that clears the frame and turns freely.
- Seat any approved cooking rack exactly as the manual directs.
- Close the door normally rather than slamming it.
- Report a new gap or loose hinge before another cooking cycle.
Safety Section
Do not operate a microwave with a bent, warped, loose, or poorly closing door, or damaged hinges, latches, or seals. The FDA advises stopping use when a microwave appears to operate with the door open. Never tape a door shut, wedge its switch, remove its outer cabinet, or test high-voltage components. A capacitor can retain a dangerous charge after unplugging. If the appliance sparks, smokes, or smells electrical, stop use and seek qualified service.
What to Tell the Technician
Provide the model number and approximate age, whether the unit is countertop or mounted, whether an empty door closes, any visible gap or crack, when the problem began, and whether a dish, rack, move, or impact preceded it. Mention any time the appliance appeared to run with its door open; that is a priority safety clue.
Key Takeaways
- Clear only visible, removable obstructions with the unit off.
- Clean contact surfaces gently, then try one normal close.
- A door that needs lifting or force is a stop-use issue.
- Never defeat the latch or open the microwave cabinet.
Homeowner Actionability Score
22/25. The homeowner can rule out a dish, rack, packaging, and soil, but damaged door and interlock work is outside safe DIY scope.
Editorial Standard
This article was checked against manufacturer guidance and the Universal Appliance Repair Knowledge Base v6.0 for safe homeowner actions, clear stop points, and source accuracy.
Sources and Further Reading
Author Information
The Universal Appliance Repair Certified Expert Team consists of experienced appliance repair professionals with more than 25 years of combined hands-on experience servicing residential appliances. Articles are reviewed using manufacturer guidance, current industry best practices, and practical field experience.