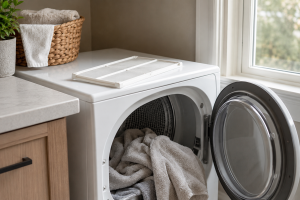
Why a Dryer That Won’t Start Is Not Always a Motor Failure
When a dryer will not start, many homeowners jump straight to "the motor is bad." Sometimes that is true, but it is not the first assumption to make. A dryer needs several things to happen before the motor can run: correct power, a selected cycle, a working start command, a closed-door signal, a healthy safety fuse or cutoff, and a drive system that is not jammed.
That means a no-start complaint can come from something simple, such as control lock or a door that did not latch. It can also come from something that needs professional testing, such as a failed thermal fuse, broken belt switch, bad door switch, stuck motor, relay failure, control board issue, terminal-block damage, or unsafe wiring.
This guide walks through safe homeowner checks before scheduling dryer repair. The goal is not to open the dryer cabinet. The goal is to identify whether the issue is a setting, power condition, user-accessible symptom, or a repair problem that should be handled with the right tools.
How a Dryer Start Circuit Works
A dryer may look simple from the outside, but its start sequence depends on multiple safety and control points. Electric dryers usually need a dedicated 240-volt circuit for heat and motor operation. Gas dryers usually use a standard outlet for controls and motor operation, while heat comes from the gas burner system. Both styles use door switches, controls, thermostats or safety devices, and a motor circuit.
When you press Start, the dryer checks whether the door is closed, the selected cycle is valid, and safety devices allow operation. If one part of that chain is open, failed, overheated, or not receiving power, the dryer may do nothing, beep, click, show an error, or briefly start and stop.
Common no-start paths include:
- Control lock or child lock blocking the start command.
- Door not fully latched or door switch not confirming closure.
- Start button not being pressed long enough on touch-control models.
- Incorrect cycle, delay start, pause mode, or app-connected setting.
- Tripped breaker, loose plug, dead outlet, or damaged power cord.
- Broken belt or belt switch preventing motor start.
- Blown thermal fuse after overheating or restricted airflow.
- Motor, relay, control board, or wiring failure.
- Drum jam from a trapped item, worn roller, or seized support part.
- Vent restriction causing overheating and repeated shutdown.
Manufacturer guidance from Whirlpool, LG, GE Appliances, and Samsung commonly starts with power, controls, door closure, cycle selection, breaker status, and visible cord or outlet condition before moving to service.
Step-by-Step Troubleshooting
1. Confirm What "Won’t Start" Means
First, notice whether the dryer is completely dead or whether it has lights, beeps, and display power. Those are two different problems. A completely dead dryer points toward power supply, outlet, breaker, cord, control, or internal electrical issues. A dryer that powers on but will not tumble points more toward door switch, control lock, start switch, belt switch, motor, relay, or control output problems.
Safe homeowner action: Take a quick photo of the control panel and any error code before resetting anything.
Call for service if: The display is on but the motor never starts, or the dryer clicks without tumbling.
2. Check Control Lock, Child Lock, and Delay Settings
Many newer dryers have control lock, child lock, delay start, remote start, wrinkle care, eco settings, or app-connected modes. These can make the dryer appear broken when the controls are simply locked or waiting.
Safe homeowner action: Look for a lock icon or message. Use the owner manual to turn off control lock. On some models, the lock clears by holding a labeled button or button pair for several seconds.
Call for service if: The control panel does not respond after the lock is cleared or buttons act erratically.
3. Press Start the Way the Model Requires
Some dryers start with a tap. Others require a firm press or a press-and-hold action. Whirlpool guidance notes that some start buttons need to be held for a few seconds, and LG guidance for touch panels notes that button sensitivity and hold timing can matter.
Safe homeowner action: Select Timed Dry or a basic cycle, close the door firmly, and press Start according to the manual.
Call for service if: The button feels stuck, the panel flashes but the motor does not run, or the dryer needs repeated attempts to respond.
4. Confirm the Door Is Fully Closed
The dryer should not run with the door open. If the door is not latched, the latch is loose, or the door switch does not report closure, the dryer may power on without starting. Door-switch symptoms can also show up as a drum light that stays on when the door is closed.
Safe homeowner action: Remove clothing caught in the door, check the lint filter area for items blocking closure, and close the door firmly without slamming it.
Call for service if: The latch is broken, the door sags, the drum light behaves incorrectly, or the dryer starts only when you push hard on the door.
5. Check the Breaker Once
Electric dryers may use a two-pole breaker. A partly tripped breaker can create confusing symptoms. Some dryers may show control power but fail to heat, while others may not start normally if the supply is wrong. Gas dryers usually use a standard household circuit, but that breaker can also trip.
Safe homeowner action: Turn the dryer breaker fully off, wait a short moment, then turn it fully on once. Make sure your hands are dry and the area is safe.
Do not do this: Do not keep resetting a breaker that trips again. Repeated tripping is a warning sign, not a reset routine.
6. Look at the Plug, Outlet, and Cord Without Touching Damaged Areas
GE and Samsung both warn homeowners to stop when cord, outlet, or terminal connections look burned, loose, broken, or damaged. Electric dryer cords and terminal blocks carry serious voltage. Gas dryers use lower-voltage plugs, but damaged outlets are still unsafe.
Safe homeowner action: From a safe distance, look for burn marks, melted plastic, loose plugs, arcing marks, or a hot smell near the outlet.
Call for service or an electrician if: You see damage, the plug is loose, the outlet is scorched, the dryer was newly installed and never worked correctly, or the breaker trips.
7. Reduce the Load and Check for Tangled Laundry
An overloaded dryer or tightly tangled load can make the drum hard to start, especially if the drive system is already weak. Heavy wet blankets, rugs, and large towels can strain the motor and belt system.
Safe homeowner action: Remove half the load and try a small, balanced load on Timed Dry. If the dryer starts with a lighter load, avoid overloading and watch for repeated strain.
Call for service if: The drum hesitates, hums, clicks, or stops even with a light load.
8. Listen for the Difference Between Silence, Beeping, Humming, and Clicking
The sound matters. Silence can point toward power, control, door switch, or fuse issues. Beeping may point toward a control message, door condition, or locked setting. Humming can mean the motor is trying but cannot turn. A click can come from a relay, switch, or motor circuit.
Safe homeowner action: Write down exactly what happens when you press Start: no sound, one click, repeated clicking, hum, beep, panel flash, or quick shutdown.
Call for service if: The dryer hums but does not turn, clicks repeatedly, or shuts off after a few seconds.
9. Consider the Thermal Fuse and Airflow History
A thermal fuse is a safety device that can stop dryer operation after overheating. A blown thermal fuse is often related to restricted airflow, lint buildup, blocked venting, or overheating. The fuse itself is not a reset button; it usually needs replacement after the underlying cause is found.
If your dryer recently took longer to dry, ran hot, smelled burnt, or had a vent warning, the no-start problem may be connected to airflow. Review the related guide on why a dryer takes two cycles to dry if drying time changed before the no-start failure.
Safe homeowner action: Clean the lint filter and do not run the dryer without it.
Call for service if: The dryer will not start after overheating symptoms, or a burnt smell appeared before failure. For odor-related warning signs, see dryer smells burnt.
10. Do Not Bypass Safety Switches
It can be tempting to tape a door switch, bypass a fuse, or jump wires to see if the dryer starts. Do not do that. These parts are designed to stop unsafe operation. Bypassing them can create shock, fire, injury, or property damage risk.
The U.S. Consumer Product Safety Commission tracks dryer safety standards and consumer awareness around dryer fire hazards through its clothes dryer safety standards work.
Safe homeowner action: Stop at observation. Leave electrical testing to a qualified technician.
Call for service if: Any repair path requires opening panels, testing continuity, replacing fuses, or accessing wiring.
11. Check Whether the Washer Left Clothes Too Wet
This does not usually prevent a dryer from starting, but it can overload the dryer and make the first few seconds harder on the motor. If the washer failed to spin properly, a heavy wet load can create dryer strain and longer dry times.
Safe homeowner action: If clothes are dripping wet, run a washer spin cycle again or remove water before drying.
Call for service if: The washer regularly leaves clothes soaked. In that case, washer repair may be needed along with dryer diagnosis.
12. Stop After the Basic Checks
Once you have checked settings, door closure, breaker status, visible plug condition, lint filter, load size, and error codes, the next steps usually involve testing parts. That is where DIY should stop.
Safety note: Dryer cabinets can have sharp edges, high-voltage terminals, moving drive parts, gas components, and lint buildup. A no-start symptom is not worth a shock, gas concern, or fire risk.
Brand-Specific Considerations
Whirlpool and Maytag dryers often direct homeowners toward control lock, start-button hold time, door latch, breaker, correct cycle selection, and service if the dryer still will not operate. Whirlpool-family dryers may also involve thermal fuse, belt switch, timer, or motor diagnosis after basic checks.
LG dryers commonly separate no-power symptoms from power-on-but-won’t-run symptoms. LG guidance includes checking the breaker, power connection, child lock, drum light, and whether the unit responds after a reset. Touch controls may require deliberate button contact.
GE dryers often emphasize plug seating, door closure, cycle selection, start button, breaker or fuse condition, door switch condition, and electric-dryer terminal-block concerns. GE guidance warns that burned or damaged power connections need replacement or professional attention.
Samsung dryers separate "won’t turn on" from "turns on but won’t start or spin." Samsung guidance points to breaker reset, power cord and outlet condition, child lock, error codes, and service when the drum will not start after basic checks.
Bosch, Miele, Electrolux, Speed Queen, Asko, and compact dryers may use model-specific locks, sensors, stacked installation requirements, or ventilation designs. Stacked dryers should not be pulled forward casually because the washer, dryer, brackets, power cord, vent, and gas line may all be affected.
Universal Appliance Repair supports major dryer brands, including Whirlpool appliance repair, LG appliance repair, GE appliance repair, and Samsung appliance repair.
Repair vs. Replace Guidance
Repair is usually worth considering when: The dryer is under 8 to 10 years old, the drum and cabinet are in good condition, the issue is likely a door switch, start switch, thermal fuse, belt switch, belt, idler, roller, sensor, relay, control, or motor problem, and replacement parts are available.
Get a professional diagnosis before deciding when: The dryer has intermittent starts, shuts off mid-cycle, trips the breaker, smells hot, clicks but will not run, or had airflow problems before it stopped. These symptoms can overlap, and guessing can lead to replacing the wrong part.
Replacement may make more sense when: The dryer is older than 12 to 15 years, has repeated electrical failures, major rust, worn drum supports plus motor problems, unavailable control boards, severe overheating damage, or repair needs that approach the cost of a comparable replacement.
Do not replace before checking: Control lock, door closure, load size, breaker status, visible plug condition, error codes, and recent washer spin performance. Many no-start complaints have repairable causes once the correct failure point is confirmed.
For broader service across laundry and kitchen appliances, Universal Appliance Repair provides full appliance repair support.
Appliance Lifespan Guide
Dryer: 10 to 13 years. Keep lint and venting clear, avoid overloading, and address overheating symptoms quickly.
Washing machine: 8 to 12 years. Avoid overloading and check hoses, drain behavior, and spin performance.
Dishwasher: 8 to 12 years. Clean the filter and inspect spray arms and door seals.
Refrigerator: 10 to 15 years. Clean coils and protect door seals.
Freezer: 10 to 20 years. Keep vents clear and watch for frost or drain problems.
Range or oven: 10 to 15 years. Keep burners, igniters, elements, and controls clean.
Maintenance Checklist
- Clean the lint filter before every load.
- Do not run the dryer without the lint filter installed.
- Keep the area around the dryer free of lint, paper, clothing, and stored items.
- Avoid overloading the drum with heavy wet loads.
- Make sure the dryer door closes without clothing caught in the seal.
- Clean the moisture sensor bars if the owner manual allows it.
- Watch for longer dry times, heat buildup, or vent warnings.
- Keep the exhaust vent path clear and properly connected.
- Do not use crushed, torn, or kinked venting.
- Stop using the dryer if the outlet, plug, or cord looks damaged.
- Schedule service when the dryer hums, clicks, overheats, or shuts off repeatedly.
Safety Section
A dryer that will not start may involve electricity, heat, moving parts, lint buildup, and gas connection concerns on gas models. Treat the symptom carefully.
Stop using the dryer and call for help if you notice:
- Burning smell or hot electrical odor.
- Scorched outlet, melted plug, or damaged cord.
- Breaker trips again after one reset.
- Dryer clicks, hums, or buzzes without tumbling.
- Drum will not move or seems jammed.
- Dryer starts only when the door is pushed hard.
- Error code returns after a reset.
- Dryer shut off after overheating.
- Lint buildup near the motor area or vent path.
- Gas dryer has any gas smell or suspected gas-line issue.
Do not attempt: Do not bypass the door switch, jump a thermal fuse, open electrical panels while connected to power, pull a stacked dryer without support, keep resetting a tripping breaker, or test gas components without proper training.
Why Choose Universal Appliance Repair
Dryer no-start problems can look alike from the outside. A locked control, failed door switch, blown thermal fuse, broken belt switch, weak motor, stuck drum, bad relay, and damaged wiring may all lead to the same homeowner complaint: "I press Start and nothing happens."
Universal Appliance Repair diagnoses the full start path: power supply clues, door and latch behavior, control input, safety devices, belt and drum movement, motor operation, airflow history, and brand-specific service patterns. That approach helps avoid replacing a motor when the real issue is a safety fuse, door switch, control setting, or airflow-related shutdown.
When the dryer has power but will not run, makes a clicking or humming sound, or shows signs of overheating, professional diagnosis can protect both the appliance and the home.
Key Takeaways
- A dryer that will not start is not always a failed motor.
- First separate no power from power-on-but-won’t-run symptoms.
- Homeowners can safely check control lock, cycle selection, door closure, breaker status, visible plug condition, and load size.
- Stop DIY checks if the breaker trips, the cord or outlet looks damaged, the dryer smells burnt, or the drum hums without turning.
- Thermal fuse failures often point to an overheating or airflow problem that also needs correction.
- Professional repair is usually needed for door switches, fuses, belt switches, motors, relays, controls, wiring, and internal testing.
Author Information
The Universal Appliance Repair Certified Expert Team consists of experienced appliance repair professionals with more than 25 years of combined hands-on experience servicing residential appliances. Articles are reviewed using manufacturer guidance, current industry best practices, and practical field experience.