Introduction
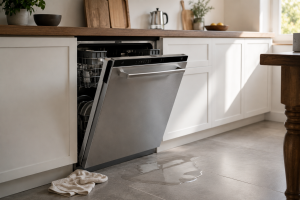
A dishwasher leak feels urgent because even a small amount of water can spread under cabinets, flooring, baseboards, and nearby walls. The difficult part is that “dishwasher leaking” does not point to one single part. The repair path changes depending on where the water appears, when it appears, and whether the leak is clear water, soapy water, dirty drain water, or steady dripping from a supply line.
The best first step is not to guess at a part. It is to map the water. Water in front of the dishwasher often points toward the door area. Water under the sink points toward plumbing connections. Water underneath the unit is more serious because it can involve pumps, seals, valves, or sensors. This guide helps homeowners narrow the problem safely before deciding whether a simple cleaning step is enough or whether professional service is the better move.
Why Dishwasher Leaks Happen
Dishwashers combine water fill, detergent, high-pressure spray, drainage, heat, and electrical controls in one cabinet opening. A small failure in any part of that system can look like “water on the floor.”
Door-area leaks often happen when the gasket is dirty, folded, brittle, or torn. Food residue and detergent film can keep the seal from making full contact. A lower-door leak may also happen when a spray arm is cracked or blocked, forcing water toward the door instead of across the racks.
Plumbing leaks usually show up under the sink or below the front kick plate. A loose drain hose, cracked hose, disposal connection, water supply fitting, or inlet valve can drip only while the dishwasher fills or drains. That timing matters.
Internal leaks are more difficult. A sump seal, pump seal, diverter seal, float switch issue, or base-pan leak sensor may require diagnosis from underneath the appliance. If your dishwasher displays a leak code or runs the drain pump nonstop, the machine may be reacting to water where homeowners cannot safely see it.
Step-by-Step Troubleshooting
1. Stop the Cycle and Protect the Floor
If you see active leaking, cancel the cycle if the controls are dry and safe to touch. Place towels around the water, move rugs away, and keep children away from the area. Do not keep running the dishwasher “just to see if it finishes.” A small leak can become cabinet swelling or subfloor damage fast.
If water is spreading under the unit, near an outlet, near a junction box, or across the kitchen floor, turn off power at the breaker if you can do so without standing in water. The CDC advises that wet electrical equipment should be handled cautiously and should not be turned back on until it is dry and inspected when there is any question: CDC electrical hazard guidance.
2. Identify Where the Water First Appears
Dry the area fully before checking again. Then look for the first wet spot, not the biggest puddle. Water travels along toe kicks, grout lines, cabinet edges, and flooring seams, so the final puddle location may be misleading.
If water starts at the lower front edge, focus on the door, gasket, spray pattern, detergent, and leveling. If it starts under the sink, focus on the drain hose, supply line, air gap, or disposal connection. If it starts from the center or back underside of the dishwasher, stop and schedule service.
3. Check the Door Gasket
Open the door and inspect the rubber gasket around the tub opening. Look for food particles, hardened detergent, sticky residue, cracks, flattening, torn corners, or sections that have pulled loose. A dirty gasket can leak even when it still looks intact from a distance.
Wipe the gasket with warm water and a soft cloth. Clean the door edge where it meets the seal. Do not cut, stretch, or glue the gasket. If the gasket is brittle, torn, missing chunks, or no longer sits evenly in its channel, replacement is usually needed.
4. Look for Rack or Door Obstructions
A dishwasher door may close but still fail to seal fully if a utensil, pan handle, cutting board, large plate, or lower rack wheel is pushing against it. Check that both racks slide fully into place and that nothing touches the detergent dispenser, spray arm, or door.
Also inspect the lower rack wheels. If the rack sits crooked or slides forward during the cycle, dishes can redirect spray toward the door. This is common when a wheel is missing, cracked, or installed incorrectly.
5. Use the Right Detergent
Dishwasher detergent is not the same as dish soap. Regular hand dish soap creates foam that can force suds and water through the door area. Too much dishwasher detergent can also cause oversudsing, especially in homes with soft water.
If you see foam, cancel the cycle and let the suds settle. Wipe out visible suds with towels. Do not add more cleaners to “neutralize” the foam. For the next load, use the recommended detergent amount and avoid overfilling rinse aid.
6. Inspect the Spray Arms
A cracked, blocked, or loose spray arm can aim water at the door seal. Spin the lower spray arm by hand when the dishwasher is off and cool. It should rotate freely and sit securely. Look for split plastic, blocked holes, or food debris stuck in the spray openings.
If the spray arm is clogged, clean the openings gently. If it is cracked or warped, replacement is usually the correct fix. Continuing to run the dishwasher with a damaged spray arm can make a door leak look like a gasket failure.
7. Check Whether the Dishwasher Is Level
A dishwasher that leans forward can allow water to collect against the door. A unit that is twisted in the cabinet can keep the door from sealing evenly. If the leak began after flooring work, cabinet work, a recent installation, or moving the appliance, leveling deserves attention.
Homeowners can place a level on the open door or rack rails for a rough check, but adjustment can be tricky if the unit is tightly installed. If leveling requires removing the kick plate, moving the unit, or working near electrical wiring, let a technician handle it.
8. Check Under the Sink
Open the sink cabinet and look at the dishwasher drain hose and water supply line. Use a flashlight and dry paper towel. Touch around connections lightly to see if moisture appears. Common leak points include the supply valve, supply hose, drain hose clamp, disposal connection, air gap tubing, and shutoff valve.
If the supply line is actively leaking, turn off the water supply valve if you can reach it safely. If the valve will not close, if it drips after closing, or if the leak is at a hidden connection, stop and call for service.
9. Watch for Drain-Related Leaks
If the leak happens late in the cycle, the dishwasher may be leaking during drain. A backed-up sink, clogged disposal connection, missing high loop, blocked air gap, or restricted drain hose can send water where it does not belong.
Run the kitchen sink briefly and confirm it drains normally. If the sink backs up, address the plumbing issue before running the dishwasher again. If the dishwasher leaves water inside the tub, review dishwasher won’t drain before assuming the leak is only a door seal problem.
10. Clean the Filter and Bottom of the Tub
A clogged filter can affect water movement and drainage. Remove and clean the filter according to the owner’s manual. Clear food scraps, labels, glass fragments, and debris from the sump area only if everything is cool, visible, and reachable without forcing parts.
Do not reach into hidden openings. Broken glass can collect near the filter. If you feel resistance, see metal, or cannot remove the filter normally, stop. A stuck filter can point to a bigger problem, and forcing it can damage the assembly.
11. Do Not Ignore Leak Sensors
Many modern dishwashers have leak detection systems. Depending on the brand, a leak code may appear as letters, numbers, flashing lights, or a drain pump that keeps running even when the unit seems off. This does not always mean water is pouring onto the floor. Sometimes a small internal drip activates a base-pan sensor.
If a leak sensor is active, do not keep resetting the dishwasher. The sensor is there to prevent more damage. Turn off power and water if safe, then schedule repair.
12. Know When the Leak Is Underneath
Water underneath the dishwasher is one of the strongest signs that DIY should stop. The leak may come from a pump seal, diverter motor seal, sump assembly, inlet valve, internal hose, cracked tub, or installation connection behind the lower access area.
Because dishwashers contain electrical parts, moving water, and cabinet-mounted connections, underneath leaks are not a good place for trial-and-error repair. A technician can remove panels safely, locate the leak under test conditions, and determine whether the failed part is serviceable.
Safety Tip
Never stand in water while touching an appliance, outlet, breaker-adjacent wiring, or wet controls. If water is near electrical parts, shut the dishwasher off at the breaker from a dry location and avoid using it until it has been inspected. Also avoid chemical shortcuts. Drain cleaners, bleach mixtures, and strong solvents can damage dishwasher parts and create unsafe fumes.
When DIY Should Stop
DIY should stop when water appears under the dishwasher, the breaker trips, you smell burning plastic or electrical odor, a leak code returns, the drain pump runs continuously, the dishwasher must be pulled from the cabinet, the water supply valve will not close, or the leak continues after simple gasket and loading checks.
Professional appliance repair is also the better choice when flooring or cabinets are already wet. At that point the goal is not only to stop the leak but also to avoid repeat water damage from an unresolved valve, pump, hose, or seal issue.
Repair vs. Replace Guidance
Repair usually makes sense when the dishwasher is under 8 years old, cleans well, has no major rust, and the leak is tied to a replaceable part such as a gasket, hose, valve, float, pump seal, spray arm, or latch. A targeted repair can be far less expensive than replacing the unit, especially if the rest of the dishwasher is in good shape.
Replacement may be worth considering when the dishwasher is 10 years old or older, has a cracked tub, repeated control issues, major rust, multiple leaks, poor cleaning performance, or repair costs approaching half the price of a comparable new unit. Replacement is also more reasonable when prior repairs have not lasted.
The biggest deciding factor is the leak source. A door gasket or hose is very different from a cracked tub or repeated base-pan leak. If the source is not obvious, diagnosis should come before deciding.
Cost Expectations
Simple dishwasher leak repairs often involve gaskets, hoses, spray arms, clamps, float components, or latch adjustments. More involved repairs may include the inlet valve, drain pump, wash pump, sump assembly, diverter seal, or internal tubing.
Costs vary by brand, model, part access, built-in installation, and whether water damage complicates the work. Before approving repair, ask what failed, whether the part is replaceable, whether there is evidence of secondary damage, and whether the technician recommends repair or replacement based on age and condition.
Appliance Lifespan Guide
Dishwasher
Typical lifespan: 8 to 12 years.
Maintenance priority: Clean the filter, inspect the door gasket, load dishes so spray arms can spin, and keep the drain path clear.
Garbage disposal connection
Typical lifespan: 8 to 15 years depending on use.
Maintenance priority: Keep the sink drain clear and make sure dishwasher drain connections are secure.
Water supply hose
Typical lifespan: Varies by material and installation.
Maintenance priority: Inspect for dampness, corrosion, kinks, swelling, or loose fittings.
Drain hose
Typical lifespan: Often similar to dishwasher service life but can fail earlier.
Maintenance priority: Avoid kinks, check clamps, and maintain proper routing.
Door gasket
Typical lifespan: Varies by heat, detergent, use, and cleaning habits.
Maintenance priority: Wipe residue and replace if torn, brittle, flattened, or loose.
Maintenance Checklist
Weekly: Wipe the door edge and gasket if food residue collects there.
Monthly: Clean the dishwasher filter and check that spray arms spin freely.
Monthly: Look under the sink for moisture around the dishwasher drain hose, supply line, disposal connection, and shutoff valve.
Every few months: Run a dishwasher cleaning cycle using a product approved for dishwashers.
Every few months: Check that the dishwasher sits level and that racks roll correctly.
After plumbing or disposal work: Confirm the dishwasher drains normally before running a full load.
After a leak: Dry the area fully and do not run another full cycle until you know where the water started.
Brand-Specific Considerations
Bosch: Leak protection systems may trigger an error or drain behavior when water reaches the base area. If a Bosch dishwasher shows leak-related symptoms, visit Bosch appliance repair for help with diagnosis.
Samsung: Samsung models may show leak or moisture-related codes, and some units may keep the drain pump running when the leak sensor detects water. See Samsung appliance repair if the code returns after basic checks.
Whirlpool, Maytag, and KitchenAid: Door gasket wear, float issues, spray arm problems, and under-sink drain routing can all contribute to leaks. Built-in access varies by model, so avoid forcing toe panels or hoses.
GE and Frigidaire: Lower-door leaks may be tied to gasket condition, latch alignment, rack position, or spray arm direction. Underneath leaks still need professional diagnosis.
LG: Leak errors, drain symptoms, and base moisture can overlap. If the unit shows a code and water is not obvious at the front, internal inspection may be needed.
Why Choose Universal Appliance Repair
Universal Appliance Repair helps homeowners move from “there is water on the floor” to a clear repair decision. Our technicians inspect the door seal, spray system, drain path, supply connections, pump area, sump, float, valves, and leak detection behavior so the actual source is addressed.
We service major dishwasher brands and can explain whether the issue is a maintenance problem, installation problem, part failure, or replacement-level concern. To book help, visit schedule service or check our service areas.
Key Takeaways
- The first clue is where water appears: front door, under sink, or underneath the dishwasher.
- Door leaks are often related to gasket residue, latch alignment, detergent, loading, spray arms, or leveling.
- Under-sink leaks often involve the drain hose, supply hose, disposal connection, shutoff valve, or air gap.
- Underneath leaks are more serious and can involve pumps, valves, seals, sensors, or internal hoses.
- Stop using the dishwasher if a leak code appears, water reaches electrical areas, or the leak returns after basic checks.
About the Author
This article was prepared by the Universal Appliance Repair Certified Expert Team using field-informed appliance repair experience, homeowner safety standards, manufacturer-style diagnostic logic, and editorial review for clarity and usefulness.
Editorial Standard
This article follows the Universal Appliance Repair Knowledge Base v6.0 editorial framework for safety-first troubleshooting, helpful internal linking, search intent alignment, AI answer readiness, geographic/service relevance, and E-E-A-T support. It is written for homeowners who need practical next steps without unsafe disassembly.
Homeowner Actionability Score
Total score: 25/25.
Problem clarity: 5/5. Separates front-door, under-sink, underneath, foam, drain-timing, and leak-code symptoms.
Safe homeowner checks: 5/5. Covers cleanup, gasket inspection, loading, detergent, spray arms, leveling, filter cleaning, and visible hose checks.
DIY stop points: 5/5. Clear stop guidance for electrical risk, underneath leaks, leak sensors, breaker trips, valve issues, and cabinet removal.
Professional service guidance: 5/5. Explains when diagnosis is needed and what parts may be involved.
SEO/AEO readiness: 5/5. Includes direct answer, symptom blocks, repair-vs-replace guidance, FAQ, brand notes, and structured data.