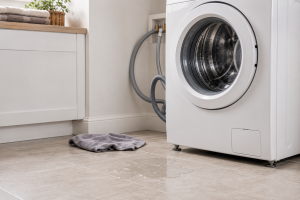
Introduction
A washer leak feels urgent because water can spread quickly. A small puddle may come from a loose hose or too much detergent. A larger leak may point to a pump, door boot, tub seal, inlet valve, or drain problem.
This guide explains safe homeowner checks and when to schedule [washer repair](/washer-repair/) before water damages flooring, cabinets, or walls.
Why This Happens
A washer moves water through fill hoses, inlet valves, dispensers, the tub, drain pump, drain hose, and standpipe. If a connection loosens, seal tears, or drain path blocks, water can escape.
Common causes include loose fill hoses, worn hose washers, cracked hoses, over-sudsing, clogged pump filters, blocked standpipes, torn door boots, leaking drain pumps, damaged tub seals, bad inlet valves, and overloaded loads. Front-load washers often leak from door seals or dispensers. Top-load washers may leak from hoses, pumps, tubs, or oversplash.
Step-by-Step Troubleshooting
1. Stop the Cycle Safely
Pause or cancel the cycle. If water is spreading, turn off the washer and close the hot and cold water valves. Unplug the washer only if you can do so without stepping in water or touching wet electrical parts.
2. Protect the Floor
Use towels to contain the water. If the washer is upstairs or near wood flooring, act quickly. Check nearby baseboards and rooms below for moisture.
3. Identify When the Leak Happens
Timing matters. A fill-cycle leak points to hoses, valves, dispenser, or tub inlet areas. A drain-cycle leak points to pump, drain hose, standpipe, or sewer line issues. A spin leak may point to tub seals, door boots, or suds.
4. Check Fill Hoses
Look behind the washer for water at the hose connections. Tighten only gently if a connection is loose. Cracked rubber, bulging hoses, rusted fittings, or dripping valves should be replaced or serviced.
5. Inspect the Drain Hose
Check whether the drain hose is kinked, loose, cracked, or pushed too far into the standpipe. If water backs up from the standpipe, the household drain may be restricted.
6. Review Detergent Use
Too much detergent can create excess suds that leak from doors, vents, dispensers, or overflow areas. Use HE detergent for high-efficiency washers and follow the detergent label and washer manual.
7. Check the Door Gasket
On front-load washers, inspect the rubber boot around the door. Look for tears, trapped clothing, coins, pet hair, or detergent buildup. ENERGY STAR recommends leaving front-load washer doors ajar after use to let moisture evaporate and following manufacturer maintenance instructions: ENERGY STAR clothes washer guidance.
8. Check the Dispenser
Water can leak from the dispenser if detergent is packed in, the drawer is dirty, or water pressure is high. Remove and clean the drawer if the manual allows. Do not force parts that resist.
9. Watch for Pump Leaks
If water appears from the lower front or underneath during drain, the pump, pump filter, or pump hose may be leaking. Some models have accessible filters, but water can spill quickly. Stop if you are unsure.
10. Stop at Repeat Leaks
If the leak returns after hose, detergent, and gasket checks, leave the washer off. Repeated leaks can damage floors and may involve internal hoses, seals, valves, pumps, or tubs.
Safety Tip
Do not step into standing water to unplug a washer. Do not remove panels while the washer is plugged in. Turn off water supply valves if a hose or valve is leaking. If water reaches wiring, an outlet, the motor area, or the control area, stop and call for service.
When DIY Should Stop
DIY should stop when the washer leaks from underneath, leaks during drain, trips a breaker, smells hot, shows control errors, or requires panel removal. Professional [appliance repair](/appliance-repair/) is safer when the issue involves pumps, valves, internal hoses, tub seals, wiring, or motor areas.
Repair vs. Replace Guidance
Repair usually makes sense: The washer is under 8 years old and likely needs hoses, a door boot, drain pump, pump filter service, inlet valve, dispenser correction, or clamp repair.
Get a diagnosis first: The leak happens only during certain cycles, appears under the cabinet, or comes with noise, vibration, drainage problems, or control errors.
Replacement may be smarter: The washer is 10-12 years old, has tub damage, bearing noise, major rust, repeated pump failures, or multiple expensive leaks.
Cost Expectations
Washer leak repair cost depends on brand, age, access, leak location, floor layout, parts availability, and whether the issue is external or internal. A fill hose is very different from a tub seal, drain pump, or cracked outer tub. Confirm the leak source before approving parts.
Appliance Lifespan Guide
Washing machine: 8-12 years. Priority: Avoid overloading and check hoses.
Dryer: 10-13 years. Priority: Clean lint screen, duct, and exterior vent.
Dishwasher: 8-12 years. Priority: Clean the filter and inspect spray arms.
Refrigerator: 10-15 years. Priority: Clean coils and protect door seals.
Range or oven: 10-15 years. Priority: Keep igniters, elements, seals, and controls clean.
Maintenance Checklist
- Inspect fill hoses twice a year.
- Replace cracked, bulging, or corroded hoses.
- Use HE detergent in high-efficiency washers.
- Avoid overloading the drum.
- Keep the washer level.
- Wipe front-load door gaskets.
- Leave front-load doors ajar after use.
- Clean accessible pump filters if the manual allows.
- Schedule service when leaks repeat.
Brand-Specific Considerations
Whirlpool, Maytag, KitchenAid, and Amana: drain pumps, tub-to-pump hoses, inlet valves, and dispenser issues are common leak checks.
GE and Hotpoint: fill hoses, drain pumps, pressure systems, and tub seals can cause lower leaks.
Samsung: door boot tears, drain pump leaks, dispenser overflow, and vibration-related leaks can occur. For brand help, see [Samsung appliance repair](/samsung-appliance-repair/).
LG: front-load door boots, pump filters, drain pumps, and dispenser areas deserve attention. See [LG appliance repair](/lg-appliance-repair/) if relevant.
Frigidaire and Electrolux: door gaskets, drain pumps, inlet valves, and internal hoses can create repeat leaks.
If the washer also fails to start, review [washer won’t start](/washer-wont-start/) for related symptoms.
Why Choose Universal Appliance Repair
Universal Appliance Repair focuses on locating the leak before replacing parts. A technician can test hoses, valves, pump seals, door boots, dispenser flow, drain paths, clamps, tub seals, and control-related leaks. To get help, visit [schedule service](/schedule-service/) or check our [service areas](/service-areas/).
Key Takeaways
- A washer leaking from the bottom may have loose hoses, over-sudsing, a torn door boot, clogged drain path, leaking pump, bad inlet valve, or tub seal issue.
- Homeowners can safely check visible hoses, detergent use, door gaskets, dispenser areas, and drain hose routing.
- Stop DIY work if water reaches wiring, the leak comes from underneath, or the washer trips power.
- Repair is often worthwhile for hoses, boots, pumps, valves, and clamps on newer washers.
About the Author
Universal Appliance Repair Certified Expert Team
The Universal Appliance Repair Certified Expert Team consists of experienced appliance repair professionals with more than 25 years of combined hands-on experience servicing residential appliances. Articles are reviewed using manufacturer guidance, current industry best practices, and practical field experience.
Editorial Standard
This article was technically reviewed for homeowner safety, practical troubleshooting value, and current appliance repair practices. Information is periodically updated, and recommendations are based on field experience, manufacturer guidance, and industry best practices.
Homeowner Actionability Score
Total score: 24/25.
Problem clarity: 5/5. The article explains leak locations, timing, and likely causes.
Safe homeowner checks: 5/5. Checks focus on hoses, detergent, door seals, visible drains, and floor protection.
DIY stop points: 5/5. Water, electrical, pump, internal hose, and tub-seal risks are clear.
Professional service guidance: 5/5. The article explains when internal diagnosis is needed.
Confidence and next steps: 4/5. Homeowners get clear actions, though hidden leaks require service.