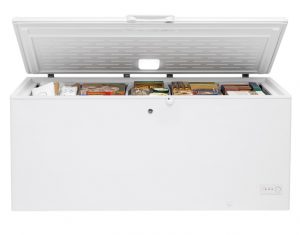
The Essentials of Defrosting a Freezer
Before we start the details of how to defrost your chest freezer, you should be aware of why it is necessary. While some freezers, such as the freezer compartments above your refrigerator may automatically defrost, this is rarely the case with chest freezers. Without periodic manual defrosting, your chest freezer will be unable to operate at maximum efficiency, so it will use more energy and money to keep all your food frozen. Additionally, your meals will lose their quality more quickly.
You should defrost your chest freezer at least once per year or if the ice develops into a ¼ inch accumulation on a significant portion of the freezer walls. Fortunately, you can usually complete this task within a day and most of this time will be waiting, so you can complete other tasks.
Step One: Reduce Your Freezer Contents
For the committed freezer cook, the prospect of running down the freezer contents can be a little daunting. Fortunately, you don’t need to clear the freezer completely, but it is a good idea to start planning your meals from the freezer for a week or two before you plan to defrost your chest freezer.
It is a good idea to plan your freezer defrost before you undertake a big cooking day or a large grocery shop. You can also incorporate freezer meals into your weekly meal plan to deplete your stores. If you need to defrost your freezer quickly, you may need to gift a few meals or make one-pot meals with random half bags of your frozen veggies.
Step Two: Relocate any Frozen Foods
Next, you’ll need to find somewhere to store more valuable freezer items. Try to make some room in your refrigerator freezer or check if you can borrow some freezer space from a neighbor for a day or two. If you’re really struggling for space, put any remaining items in a cooler with ice or a refrigerator for temporary storage of low-cost items.
Step Three: The Defrost
You’ll need to check your appliance owner’s manual, as different manufacturers have different recommendations, but the basic steps typically begin with turning off your chest freezer and opening the lid. This will help the ice to melt, but some models do allow to use warm water or fans to speed up this process. Remember that you’ll need a way to drain the resulting water, so check if your model has a hose attached for convenience.
Step Four: Clean and Dry
Once your chest freezer has thawed, and all the water is removed, use warm soapy water to wash down the bottom and sides. If there are lingering odors, add a little baking soda or dish soap to your water. After washing, towel dry to remove any moisture that could form into ice.
Step Five: Bring Back to Temperature
Once your chest freezer is fully dry, close the lid and switch it back on. Most manufacturers recommend leaving the freezer on for up to 8 hours to bring it back to temperature before you can organize and restock. This will provide an opportunity to mark any frozen items with a use by date and keep any items that need using soon near the top or in your refrigerator freezer, so they don’t get forgotten and wasted.
If your chest freezer is having problems maintaining temperature and seems to be accumulating ice more frequently, you can rely on a professional home appliance technician for a long-term solution. There are many reasons why your chest freezer may not be operating efficiently, and a home appliance repair specialist can help.
