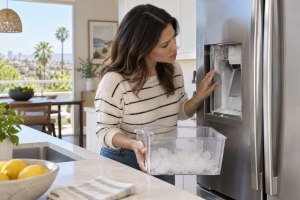
A Full Ice Bin Changes the Diagnosis
Opening the freezer to a bin full of cubes is useful evidence. Water reached the mold, the freezer made ice, and the harvest cycle moved it into storage. The problem begins later, where a motor, auger, bucket drive, chute, door switch, and dispenser flap cooperate to move those cubes into a glass. Replacing an ice maker without checking that path can miss the fault entirely.
A few days of light ice use can let cubes fuse in the bin. GE Appliances advises checking the doors, bucket, and chute before booking service for a dispenser that will not deliver ice. It also notes that recurring bucket freezing can point to an overfill or leak. The important distinction is a one-time clump versus a pattern that returns after the bin is cleaned.
Start by listening, not reaching. A silent dispenser with a closed door suggests a different branch from a motor that audibly turns but cannot move a solid block. A warm ice room, wet chute, or frost around the flap is another clue. For related issues, compare ice maker not making ice with refrigerator water dispenser trouble.
If the symptom persists after the safe checks, these related guides and service options can help: Refrigerator repair, Ice maker not making ice.
Step-by-Step Troubleshooting
1. Confirm that the bin actually contains loose ice
Open the freezer or ice room and look through the accessible bin. A nearly empty bin sends you to production and freezer-temperature checks; a full bin keeps the focus on delivery. Do not reach into the ice-maker ejector mechanism.
2. Clear the dispenser lock
A child lock can disable the paddle while the ice maker continues to fill the bin. Read the panel and use the model’s unlock sequence. If the display is dark or several controls have failed, note that broader symptom.
3. Close every door completely
Many refrigerators will not run the dispenser with a door open. Look for a protruding shelf, food package, or ice bin that prevents closure. Do not hold a door switch down to defeat the interlock.
4. Compare water and ice at the door
If water works but ice does not, the household supply is less likely to be the immediate issue. If neither works, check lock and door conditions before blaming the ice drive. A leak or weak water flow belongs on a separate repair path.
5. Listen during one short dispense attempt
Use a sturdy glass and press the paddle briefly. Silence, a click, a steady hum, and grinding are different observations. Stop if the sound is harsh or repeated attempts make the bin or chute warm.
6. Inspect the removable bucket
Turn dispensing off, then remove the bin only as the manual directs. Look for fused cubes, a cracked housing, or a drive fork that cannot engage. A bucket frozen into place should not be pried loose.
7. Discard clumps and dry the bucket
If the manual permits removal, empty the bin and rinse it with warm water. Dry it fully before reinstalling so the first layer of ice does not freeze to a wet surface. GE gives this as a homeowner check for frozen cubes, not a cure for a recurring leak.
8. Check the accessible chute and flap
Use a flashlight from outside the chute. Some model manuals describe a safe way to clear an ice bridge after the bin is removed. Follow only that procedure; never insert fingers, knives, or metal tools into the moving path.
9. Reseat the bin and compare cubed with crushed
A crooked bin may not engage the drive. Push it into place without force, then make one brief test. If crushed works but cubes do not, note the selector behavior for the technician.
10. Watch for refreezing
After one successful cleanup, check whether ice fuses again over the next few days. Repeated clumping, a dripping chute, or a flap that remains open calls for diagnosis of sealing, fill, and drive components rather than repeated bin washing.
Brand-Specific Considerations
GE: Some models allow bucket removal and warm-water cleaning of fused cubes. GE separates not-dispensing from not-producing ice, which helps avoid replacing the wrong assembly.
Samsung and LG: In-door ice rooms, bucket latches, and test procedures vary by model. Do not force a frozen bin or run repeated resets when frost quickly returns.
Whirlpool and KitchenAid: Dispenser Lock, door-switch behavior, and bin-drive alignment differ across models. Use the model number and manual before attempting bucket removal.
Sub-Zero and built-in refrigeration: Integrated cabinetry can make service access difficult. Do not pull out a built-in refrigerator to inspect hidden wiring or water connections.
Repair vs. Replace Guidance
A removable bucket, dispenser switch, flap, or auger drive is often repairable when the refrigerator holds safe temperatures and the cabinet is sound. Get a diagnosis before buying an ice-maker assembly; that part may be working. Replacement becomes a wider discussion if an older refrigerator also has persistent cooling trouble, water damage, or unavailable dispenser parts. Repair cost depends on access, brand, parts, and whether a recurrent freeze-up has more than one cause.
Appliance Lifespan Table
Refrigerator: 10-15 years. Maintenance priority: clean coils, protect door seals, and keep temperatures steady.
Freezer: 10-20 years. Maintenance priority: keep vents clear, check gasket contact, and defrost models that require manual defrosting.
Dishwasher: 8-12 years. Maintenance priority: clean the filter, inspect spray arms, and avoid blocked drain paths.
Washing machine: 8-12 years. Maintenance priority: avoid overloading, use the right detergent amount, and inspect hoses.
Dryer: 10-13 years. Maintenance priority: clean the lint filter, vent path, and exterior termination.
Range or oven: 10-15 years. Maintenance priority: keep burners, igniters, caps, racks, and controls clean.
Maintenance Checklist
- Discard old or fused cubes periodically if ice use is light.
- Dry a washed ice bin completely before reinstalling it.
- Keep door gaskets and dispenser flap clean without forcing them.
- Do not pack food against an ice-room door or bucket.
- Record recurring frost or drips before cleaning them away.
Safety Section
Turn dispensing off before removing the bin. Never bypass the door switch, put a hand into the chute, or use a metal tool near the auger. Do not pry a frozen bin or apply a heat gun to refrigerator plastic. If water appears near wiring or the floor, close the supply valve if it is safely accessible and arrange service. A refrigerator that also fails to hold safe temperatures needs food-protection steps and cooling diagnosis, not only a dispenser repair.
What to Tell the Technician
Report whether the bin is full, whether water dispenses, which ice mode was selected, and what sound the paddle produces. Mention whether cleaning the bucket helped once or whether clumps returned, and photograph frost or drips before they disappear.
Key Takeaways
- A full bin points to delivery, not necessarily ice production.
- Check lock, door closure, and bucket seating before assuming a motor failure.
- One clump can be cleaned; repeated refreezing needs diagnosis.
- Keep fingers and tools out of the auger and chute.
Homeowner Actionability Score
24/25. A homeowner can confirm ice production, unlock controls, inspect a removable bin, listen once, and document refreezing. The drive, switch, wiring, and hidden chute mechanisms remain professional work.
Editorial Standard
This article was technically reviewed for homeowner safety, practical troubleshooting value, answer-engine clarity, link accuracy, and current appliance repair practices. Recommendations follow manufacturer guidance, public safety sources, and the Universal Appliance Repair Knowledge Base v6.0.
Sources and Further Reading
Author Information
The Universal Appliance Repair Certified Expert Team consists of experienced appliance repair professionals with more than 25 years of combined hands-on experience servicing residential appliances. Articles are reviewed using manufacturer guidance, current industry best practices, and practical field experience.