Check the Refrigerator Door Seals
In some cases, the lack of cooling within the refrigerator is caused by the escape of cooled air which lowers the internal temperature. This is good news because it’s easy to fix with the correct door seal for your make and model refrigerator. Check the integrity of the door seal to see if there are any signs of wear, cracks, or damage. If you do see any tears, warping, or other forms of damage, order a new seal. It’s very easy to pull the old door seals off the door and push the new door seals into place.
Check the Thermostat
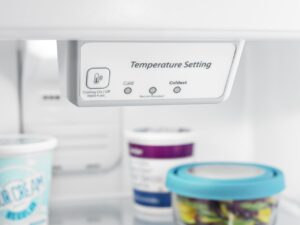
The thermostat is the brain of the entire refrigeration system and any problems with this component will degrade the cooling performance. In some cases this may be a relatively simple fix, the temperature may be incorrectly set and an adjustment is required. To check if the thermostat is faulty use a multimeter to check for continuity and function. If the thermostat has failed it’s unlikely that it can be fixed and it should be replaced to restore the cooling functionality.
Check the Condenser Coils
These are located at the rear or on the underside of the refrigerator. They look like a series of thin metallic radiators arranged in series. They connect the refrigerator compressor unit to the freezer and they need to be clean and unobstructed. A lack of airflow to the condenser coils with dust, dirt, pet dander, and other contaminants can degrade cooling performance. Inspect the coils for any signs of damage and clean them with a soft clean brush or a vacuum cleaner with a brush attachment. Take care to remove any dirt carefully to avoid damaging the condenser coils. For optimal cooling efficiency it’s a great idea to clean the condenser coils every 6-12 months. Consider cleaning them at a shorter interval if you have a lot of furry pets living in your home. Regular cleaning will limit the buildup of dirt and keep the refrigerator working efficiently.
Check for Frost Buildup
Many people believe that the presence of frost in their freezer is a sign that the appliance is cooling properly. This is incorrect, a buildup of frost is a sure sign that something is wrong and that could be as simple as setting the temperature too low. When frost buildup occurs in a freezer it may block the vent which degrades the performance and energy efficiency. For this reason, it’s a good idea to periodically take items out of the freezer and defrost the appliance. Do this when the freezer is relatively empty and/or place the food items in a cooler until the process is complete. When you’re ready, turn the freezer off, leave the door open, place down some old towels to soak up any water, and allow the ice to melt naturally. The process can be sped up with a hairdryer or you may have a modern refrigerator that has a good defrost function. When the ice has melted it’s time to dry and clean the freezer before you replace the food items. If the freezer is regularly defrosted the airflow will be improved and frost buildup is less likely.
Check the Evaporator Fan
This component is usually located somewhere in the freezer compartment. This part circulates colder air from the evaporator coils around the refrigerator. This is usually a sealed unit, it’s hard to see inside, but if you listen closely you should hear the fan running. If there is no sound it’s a sure sign that the fan needs to be replaced. Another possible solution is to check around the fan unit for obstructions that could be preventing it from turning. If these obstructions are removed there is a good chance that the evaporator fan will start to turn again.
Check the Air Inlet Damper
This is a critical part that controls how much cold air passes from the freezer into the refrigerator. Gradually, this component can degrade, stick or even break entirely which will impede the flow of colder air into the refrigerator. If there are warm spots inside the refrigerator this could be a sign that the air inlet damper is at fault. Check the part for any obvious signs of damage or obstructions that may be impeding the airflow. The owner’s manual for your refrigerator will have instructions on how to access and replace an air inlet damper. After replacement, it’s a good idea to monitor the performance and check the internal refrigerator temperature with a thermometer. Move the thermometer around the fridge compartment to ensure that there are no warm spots.
Check the Refrigerant
Many people believe that their refrigerator cools down the food inside but the cooling is a side effect of the appliance removing heat. To facilitate this process the refrigerator uses a circulatory system filled with refrigerant that moves from a liquid to a gas state and back again. If there is a refrigerant leak and the level of refrigerant drops there will be a loss of performance and the appliance will work harder for no gain. Some common signs of a lack of refrigerant, include evaporator coil frost buildup, a continuously running compressor, unusual bubbling or hissing noises, and an obvious drop in cooling performance. To fix this problem, locate the leak, repair it, and then recharge the refrigerator with refrigerant. This may sound simple, but bear in mind that refrigerants are dangerous chemicals and they require special handling. It’s advisable to contact a licensed appliance repair technician to fix a refrigerant leak for you.
